Service Requests and Roadside Guide
Use this guide for incident reporting, roadside assistance, Auto Damage Specialist communication, declaration page follow-up, optional plan items, and Stripe setup for eligible reimbursements.
For service rules, see Eligible Events and Reporting, Transportation, Roadside, Rental, and Travel, and Repair Network, Total Loss, and Shops.
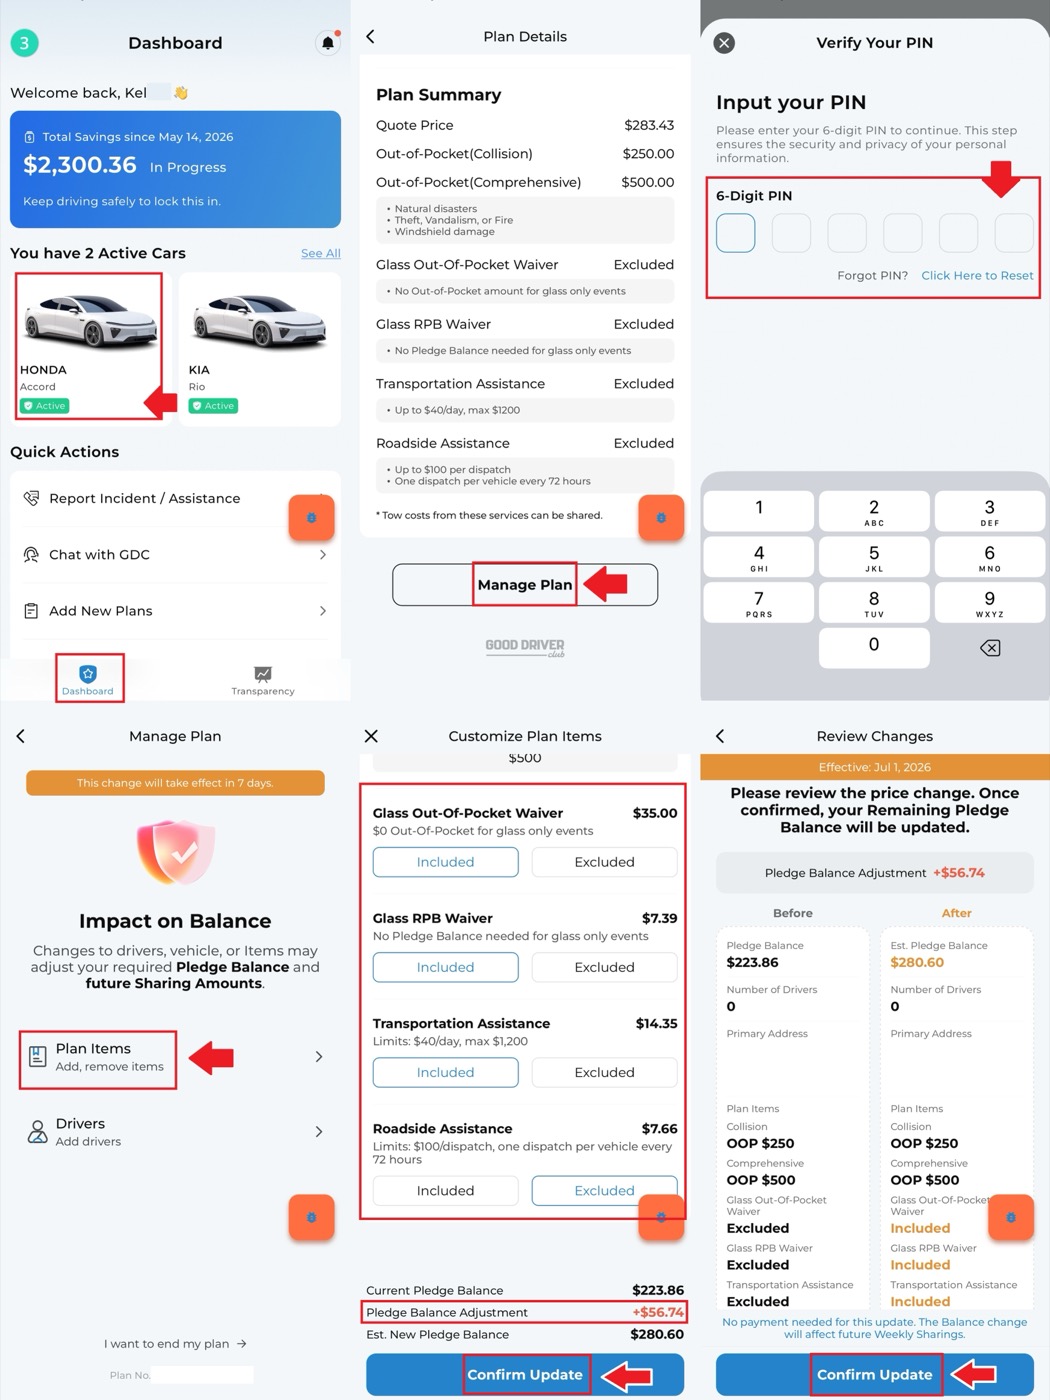
Add optional plan items
Optional items may include glass out-of-pocket waiver, transportation assistance, and roadside assistance.
To add an item:
- Go to the Dashboard.
- Select the plan.
- Open Plan Details.
- Tap Manage Plan.
- Enter the PIN.
- Select Items.
- Choose the item you want to add.
- Confirm the update.
Remove newly added optional items
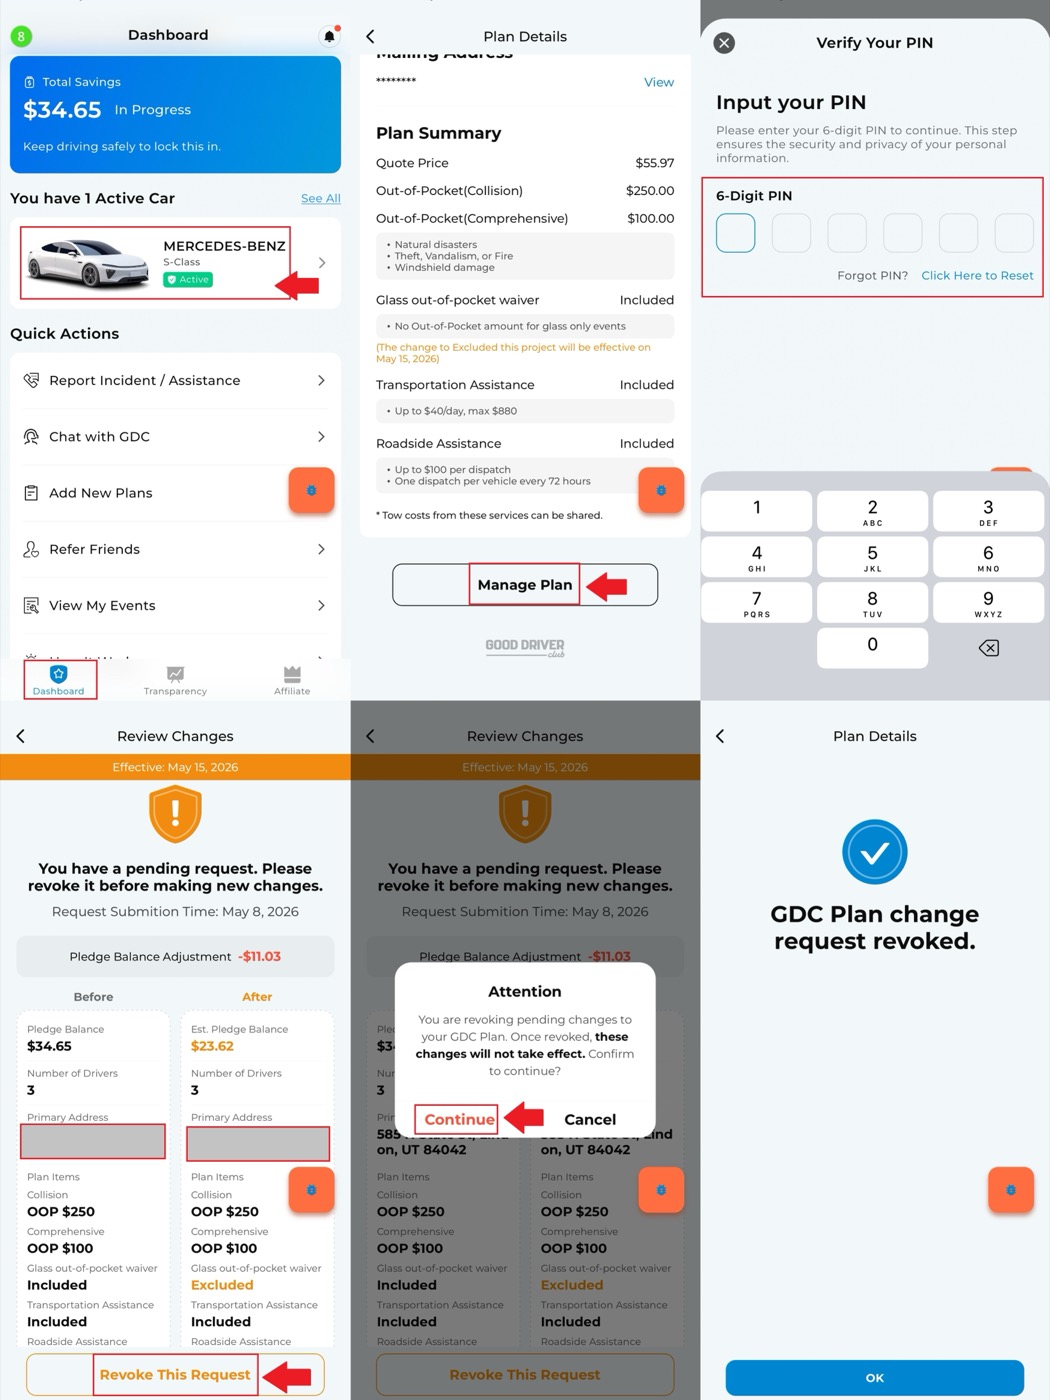
If removal is available within the allowed window:
- Go to the Dashboard.
- Select the plan.
- Open Plan Details.
- Tap Manage Plan.
- Enter the PIN.
- Select Items.
- Choose the item you want to remove.
- Confirm the update.
Contact an Auto Damage Specialist
If an Auto Damage Specialist is assigned, use the app message thread to communicate when possible. This keeps the conversation attached to the event.
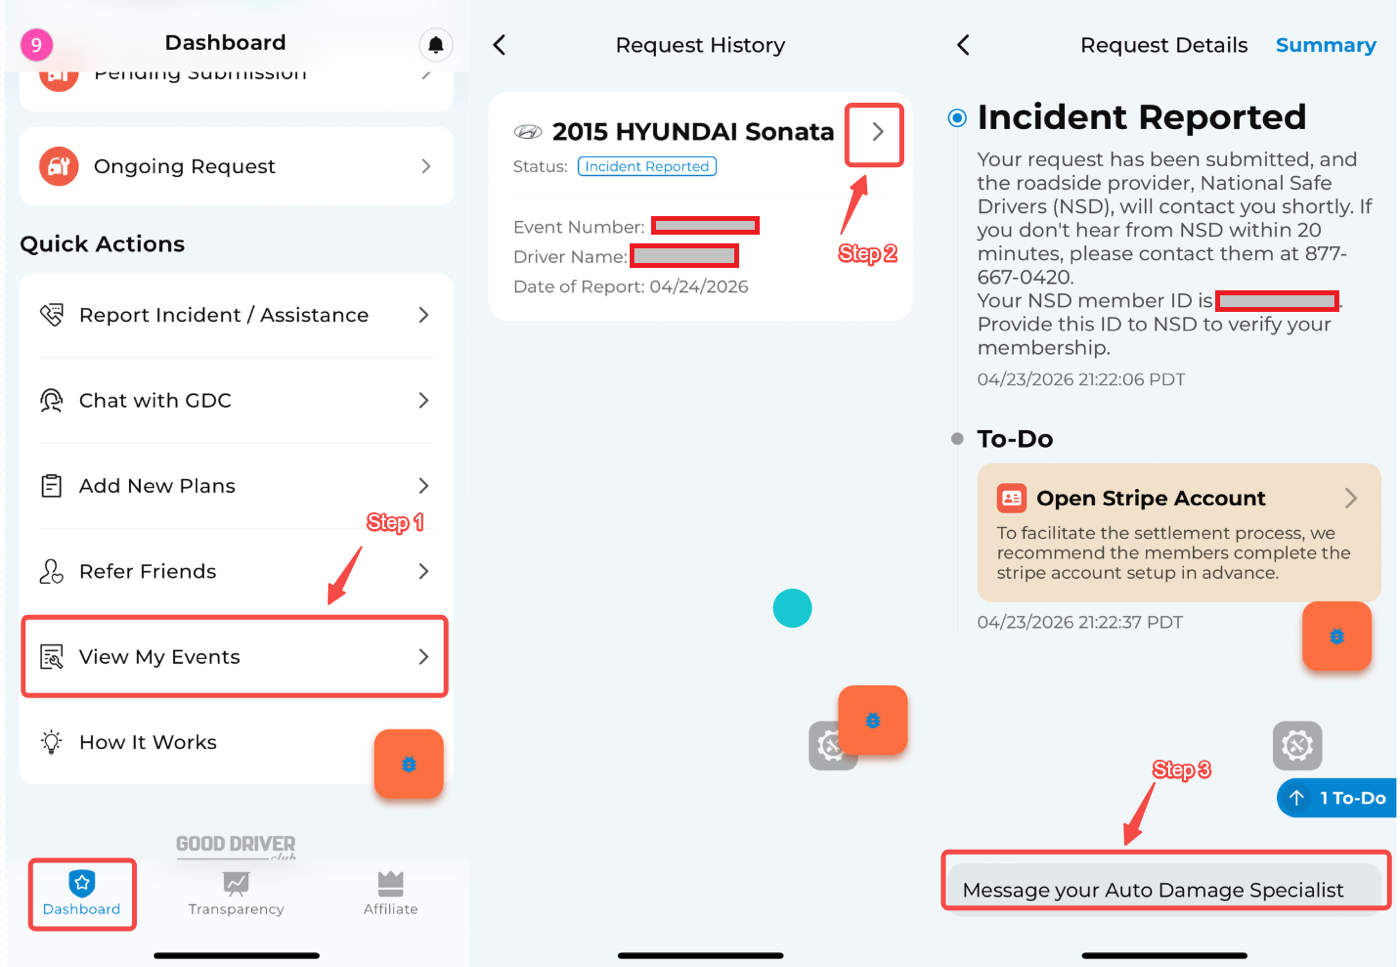
Report an incident
To report an incident:
- Open the GDC App.
- Go to the Dashboard.
- Tap Report Incident.
- Follow the app prompts to provide incident details, such as time, location, and description.
- Upload requested materials.
- Submit the report.
Full visual guide: How to Report Incident.
Upload a declaration page after reporting an incident
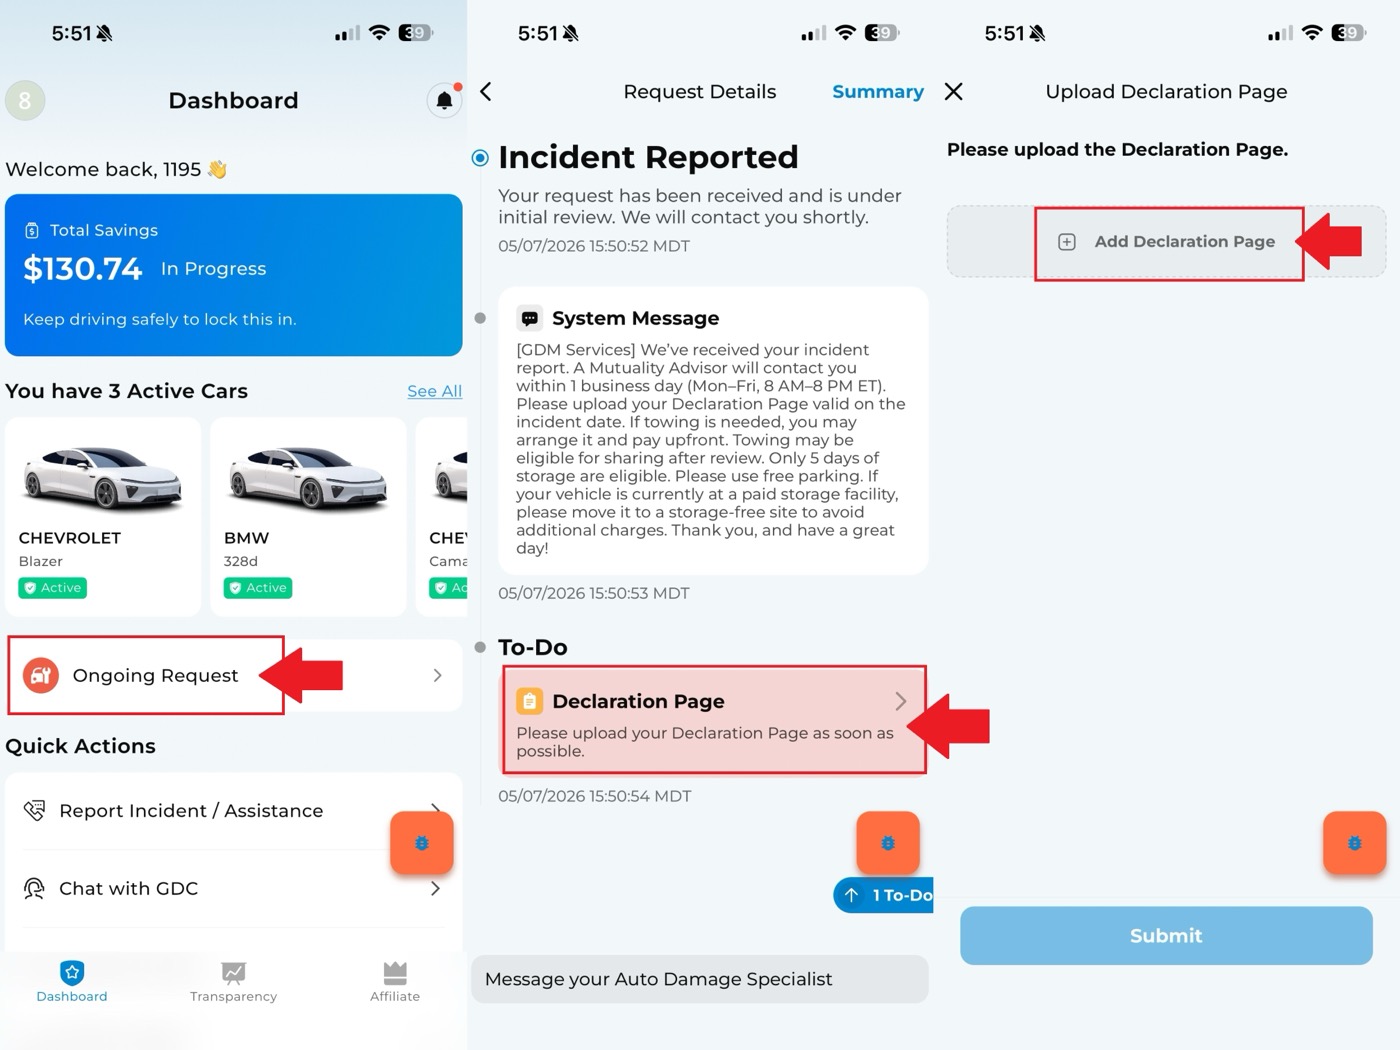
If the app asks for a declaration page after an incident:
- Go to the Dashboard.
- Open Ongoing Requests.
- In To-Do, tap Declaration Page.
- Upload the declaration page and follow the prompts.
Event pending submission
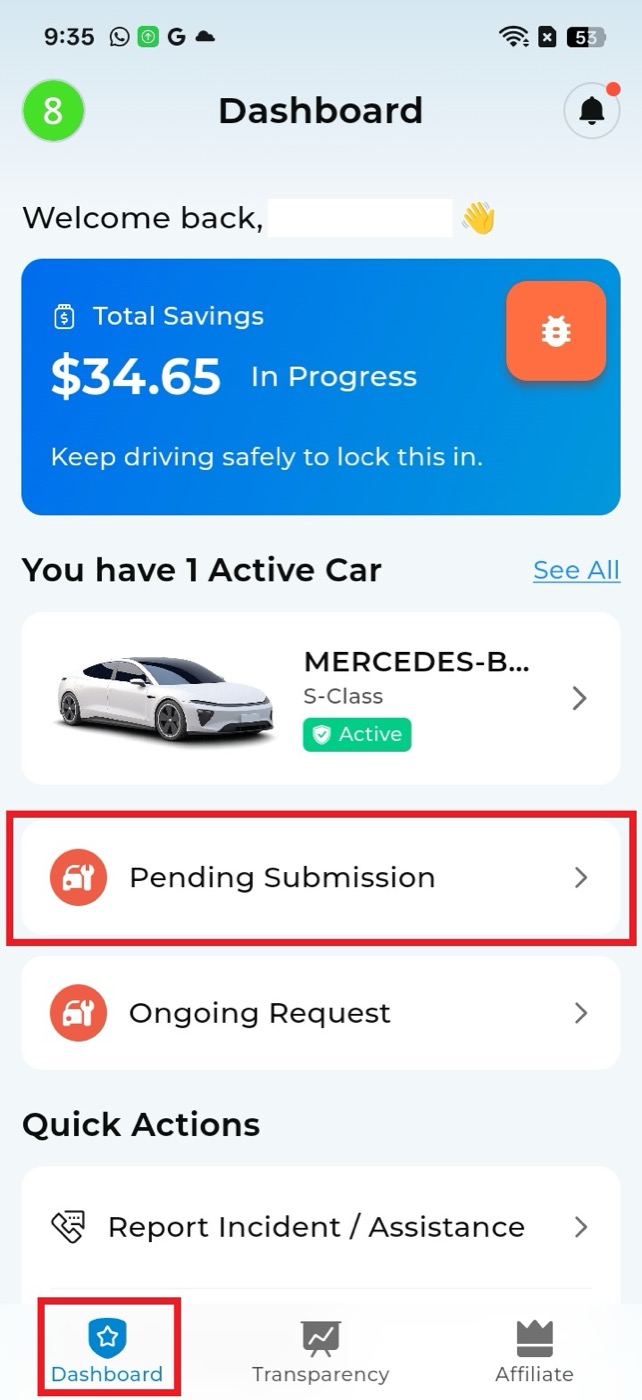
If an event is still pending submission, review the task list in the app and complete any required uploads or forms before submitting.
Request roadside assistance
To request roadside assistance:
- On the Dashboard, tap Report Incident.
- Select Request Roadside Assistance.
- Choose the vehicle.
- Select the roadside assistance reason.
- Follow the prompts to enter vehicle and service details.
Full visual guide: How to Request Roadside Assistance.
Activate roadside assistance
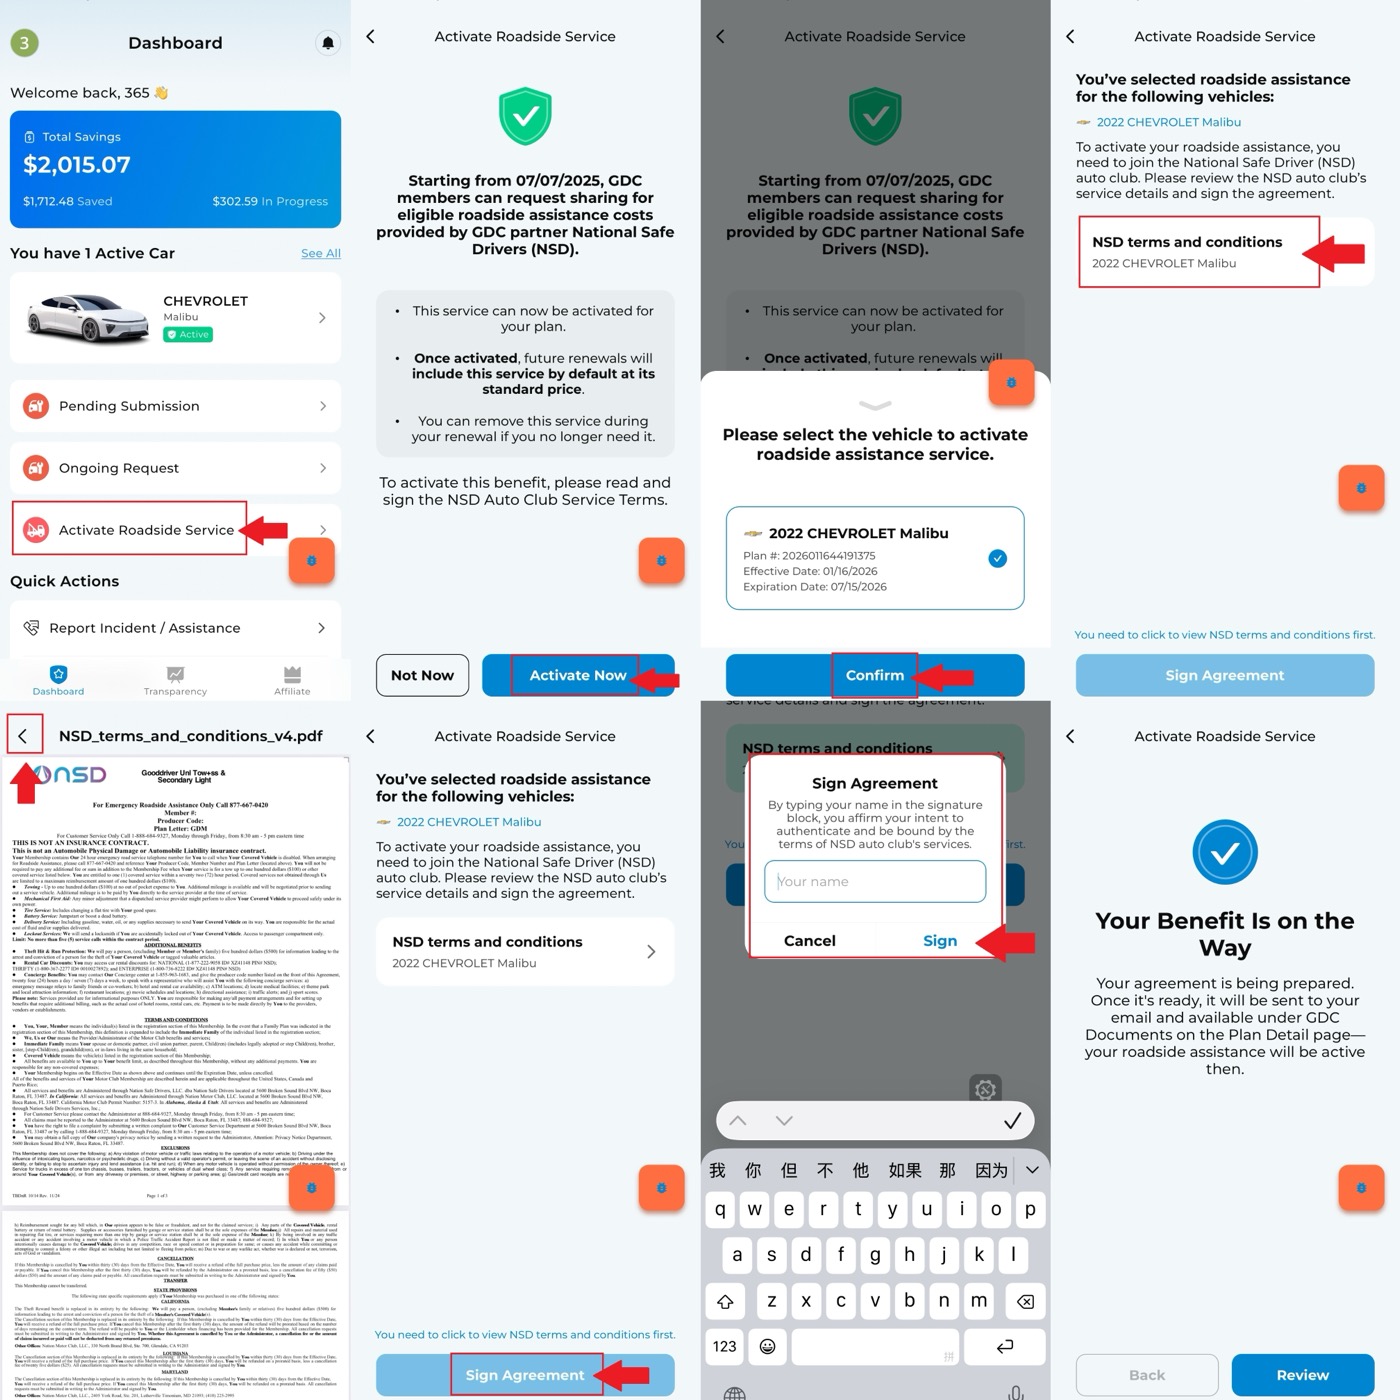
If roadside assistance needs to be activated from the plan:
- Open the GDC App.
- Select the plan.
- Open Plan Details.
- Follow the roadside assistance activation prompt.
Download NSD terms
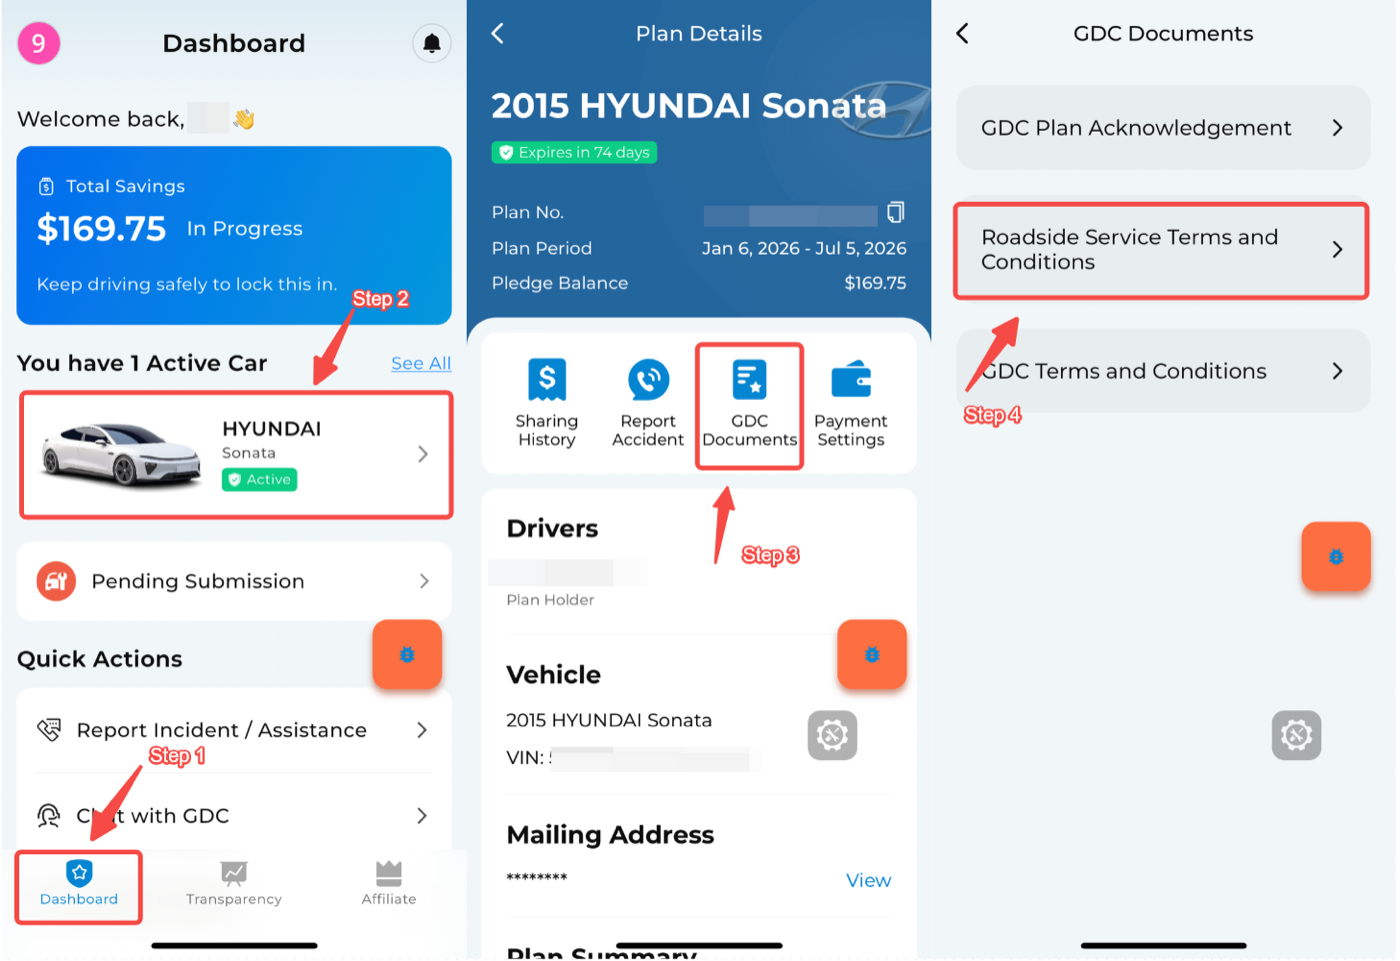
To find roadside service terms:
- On the Dashboard, select the mutuality plan.
- Open Plan Details.
- Tap Mutuality Documents.
- Open Roadside Service Terms and Conditions.
Set up a Stripe account for service payments
If GDC needs to disburse funds to you for an eligible service situation, you may be asked to set up a Stripe account.
When setting up Stripe:
- Use the language selector if needed.
- Enter your personal email and mobile phone number.
- Enter the 2FA code sent to your phone.
- Choose Individual.
- If asked for a website, choose the option to add a product description instead.
- Choose your bank account.
- Confirm the bank account for funds.
- Review and submit the details.
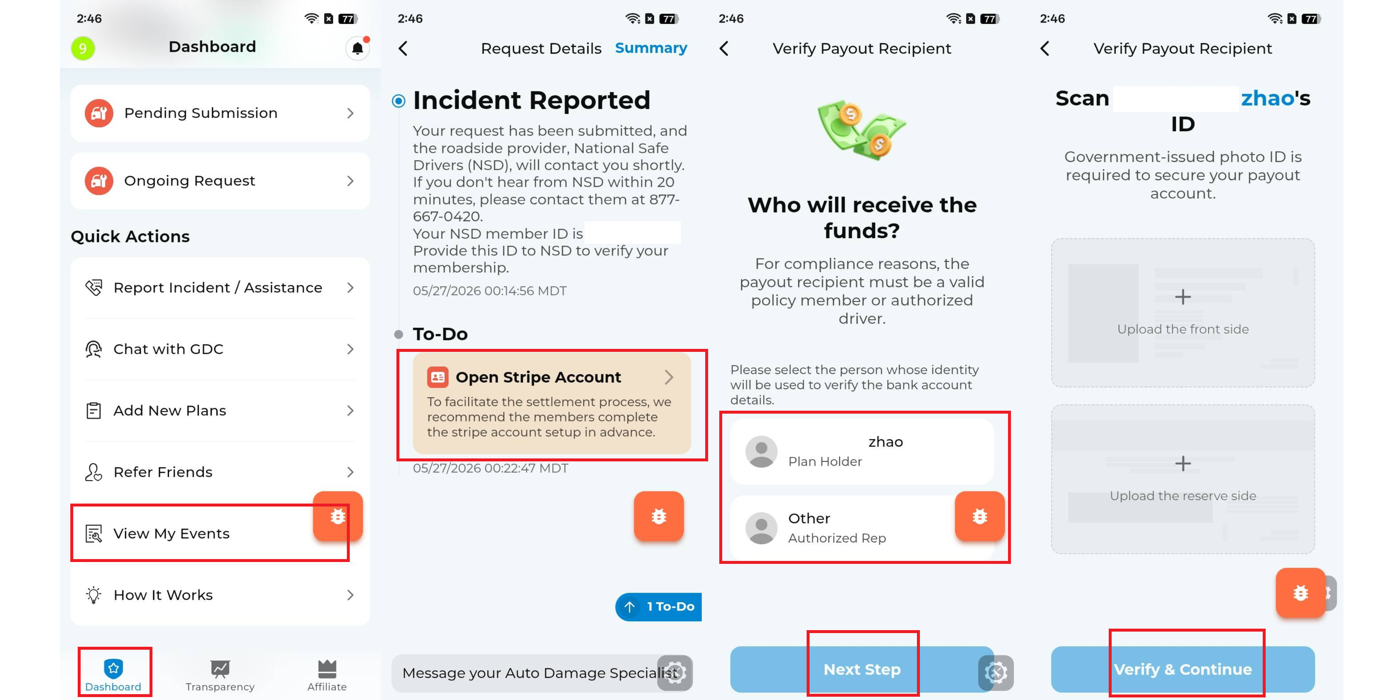
Full visual guide: Stripe Setup Guide.
Glass-only event note
For glass-only events, GDC may use high-quality glass service with lifetime warranty support. The price may be higher than some local shops. If you do not accept the repair price, contact the assigned specialist to ask whether the glass repair sharing request can be canceled so you can repair independently.
Repair journey and FAQ
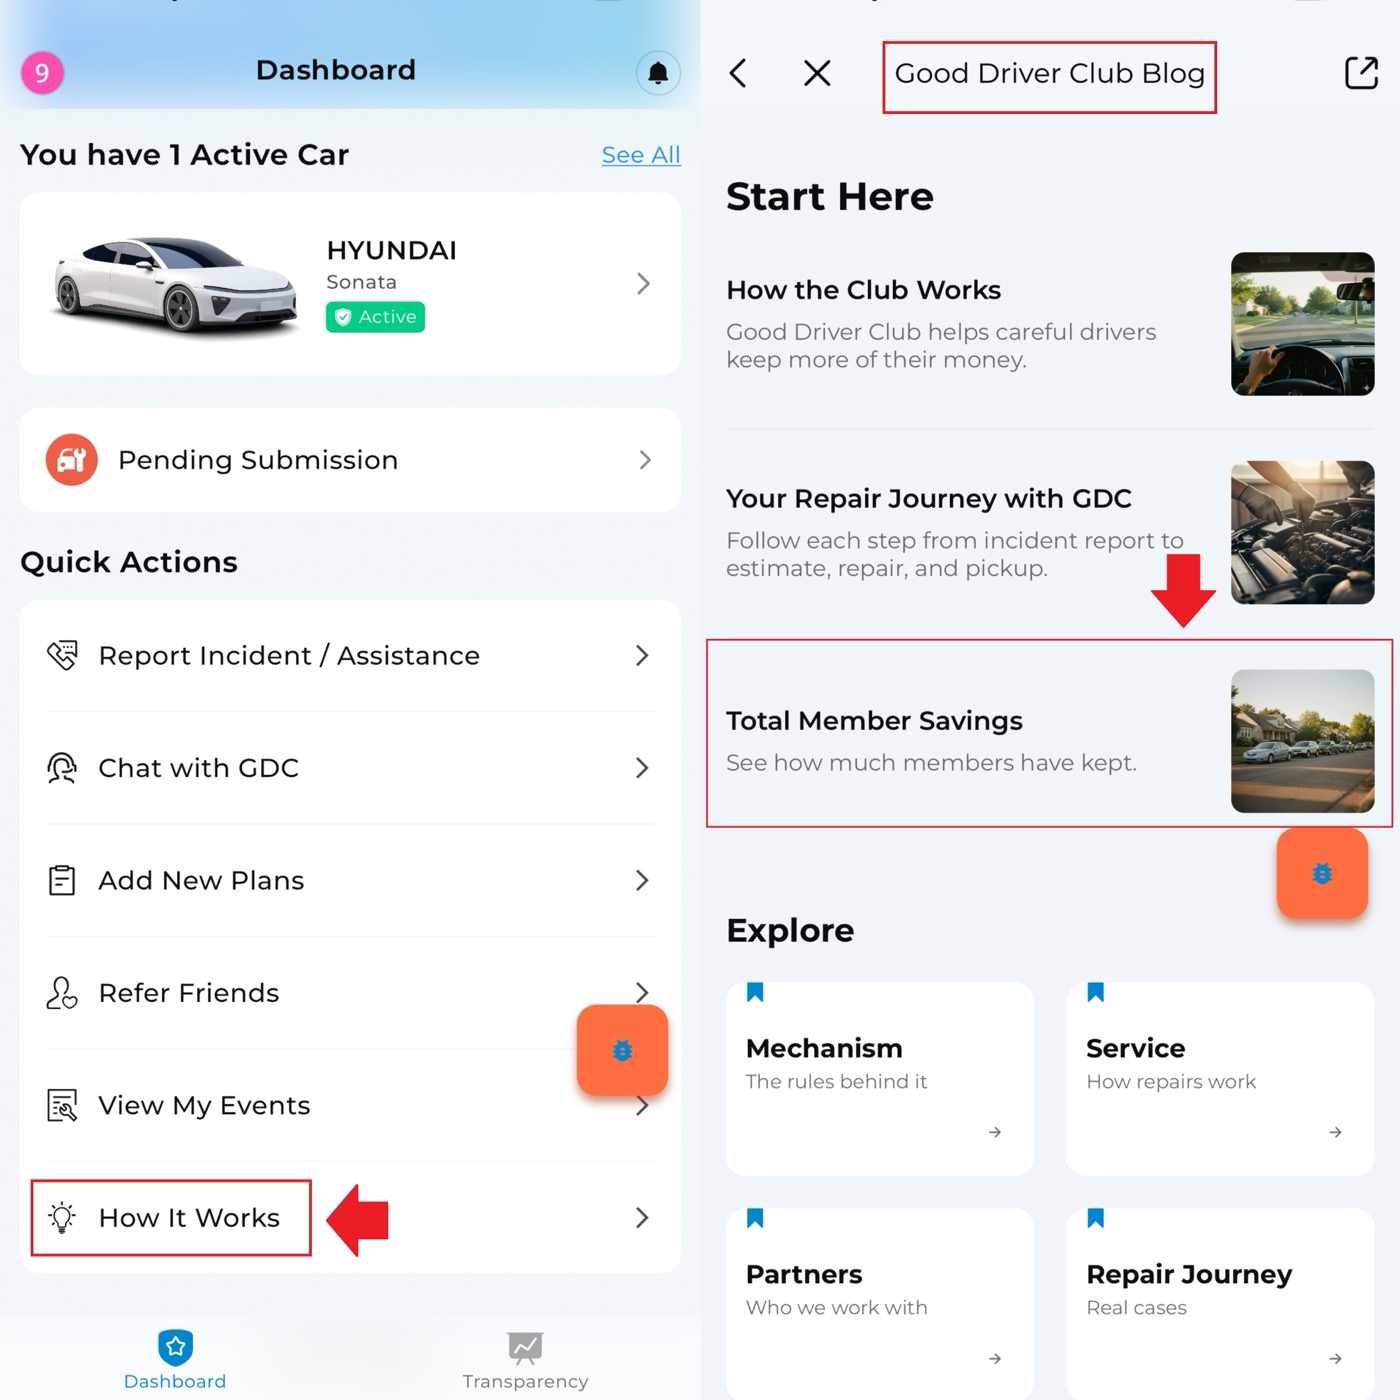
The app includes repair journey and FAQ materials under How it works.